@font-face is a CSS rule that allows you to display fonts on web pages on the web. Before there was this rule, webmasters could use a limited set of fonts on their sites that were most common and installed on users' computers. With the advent of @font-face, any specific font can easily be attached to a website.
If you downloaded the font on our site, in archive with fonts you will find ready CSS code which should be copied and placed in the CSS-document connected to the project.
Step by step installation
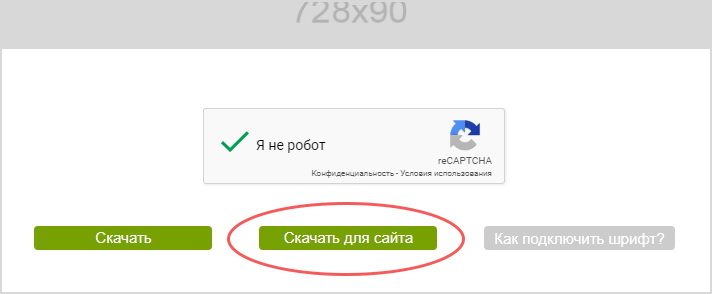
1. Select the font you want and click "download for site".
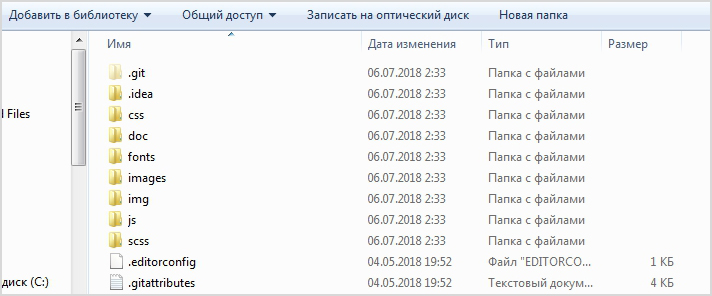
2. In the root of your site create a folder fonts, and copy the downloaded fonts.
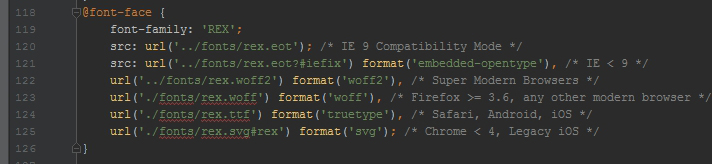
Open your CSS document and copy the content of the text file from the archive into it.
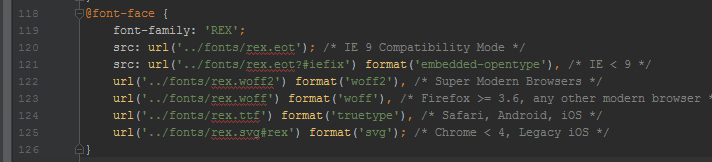
4. Make sure the path to the font folder is spelled correctly. Depending on the position of the folder where the fonts are located, the path may contain one or more dots.
5. Done. Copy the property with the name of the family and paste it into the selector, for which you prescribe styles.

What if I've already downloaded a font elsewhere and I want to plug it in?
In this case, you need to find a font converter on the internet and convert your ttf font (or otf) to the right formats, namely eot, svg, woff and woff2. This is to ensure that the font displays and works correctly in all browsers, as well as on mobile devices.
Then you have to write the @font-face rule yourself, respecting its syntax.
Syntax @font-face
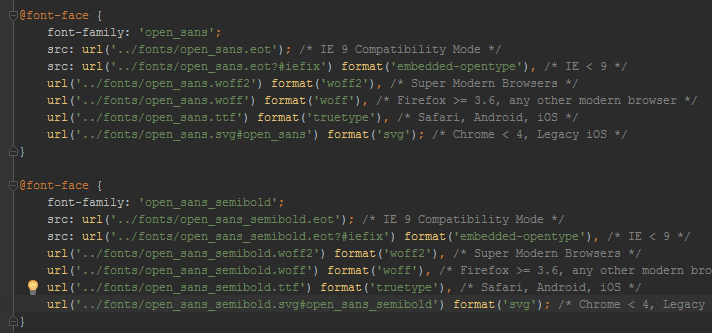
The syntax of the rule can be roughly divided into basic properties and advanced properties.
Basic:
- font-family - specifies the name of the font.
- src - Specifies the path of the font. This may be the URL of the font located on your site's server, URL fonts located on someone else's server (such as Google Fonts), or just the name of the font located on the user's computer (Helvetica New Bold, Tahoma, Georgia, etc.) .
Expanded:
- font-display - Determines how the font will be displayed, depending on whether it has been downloaded and is ready for use.
- font-stretch - allows you to adjust the width of the text.
- font-style - determines the font outline - regular, italic, or slant (the latter two are not the same thing).
- font-weight - Sets the saturation of the font, on a scale of 100 to 900 (100-super light, 900-super bold).
- font-variant - it determines how to represent lowercase letters - leave them unmodified or make them all capitals of reduced size (capitals).
- font-feature-settings - allows you to manage advanced typographic features in OpenType fonts.
- font-variations-settings - allows low-level control over Open Type and TrueType font variations by specifying four-letter axis names.
- unicode-range - specifies the range of Unicode codes(glyphs) to be used in the font.
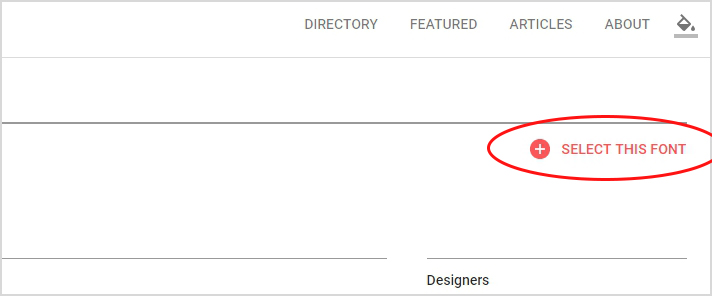
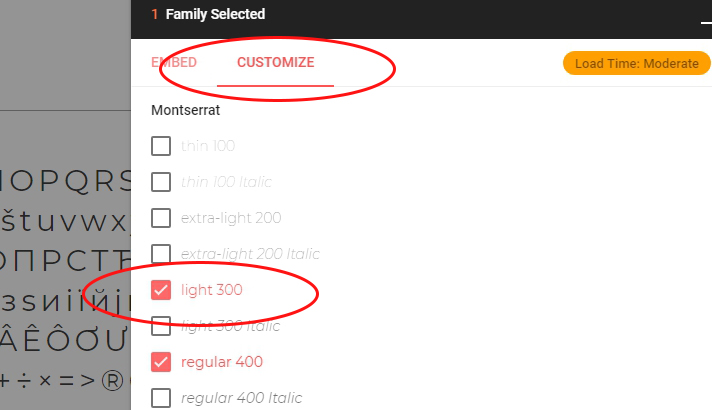
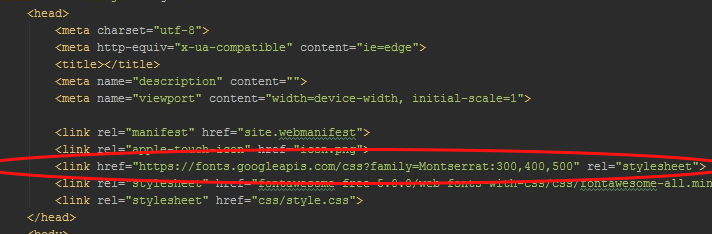
Connecting the font to the site with Google Fonts
Using Google Fonts is the easiest way to connect a font to a website. Go to their site, find the font you want, choose the right fonts to install, and copy the code.
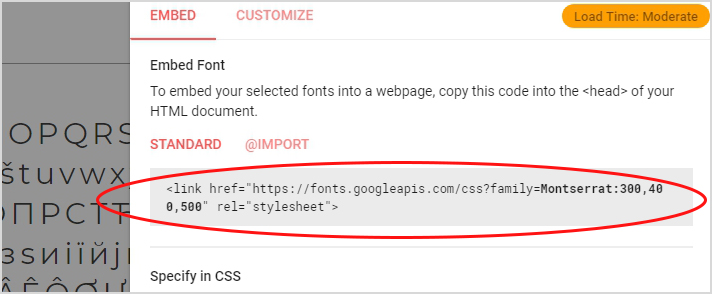
The copied code should be placed in the body of the head tag, on your html page.
Disadvantage of this method is that if during the design of the site you have no internet - fonts will not be displayed and will be replaced by standard ones because the files are not located on your local computer, and on Google servers. Also, there are chances that when you come to the client for a layout presentation (or just for agreement) and he does not have Wi-Fi, the problem will happen again.


